Weigh In Motion Strip Sensors Weighing System

Weigh-In-Motion Strip Sensors Weighing System
Keyword: Weigh-In-Motion Strip Sensors, Narrow strip dynamic weighing system,narrow strain weighing sensors
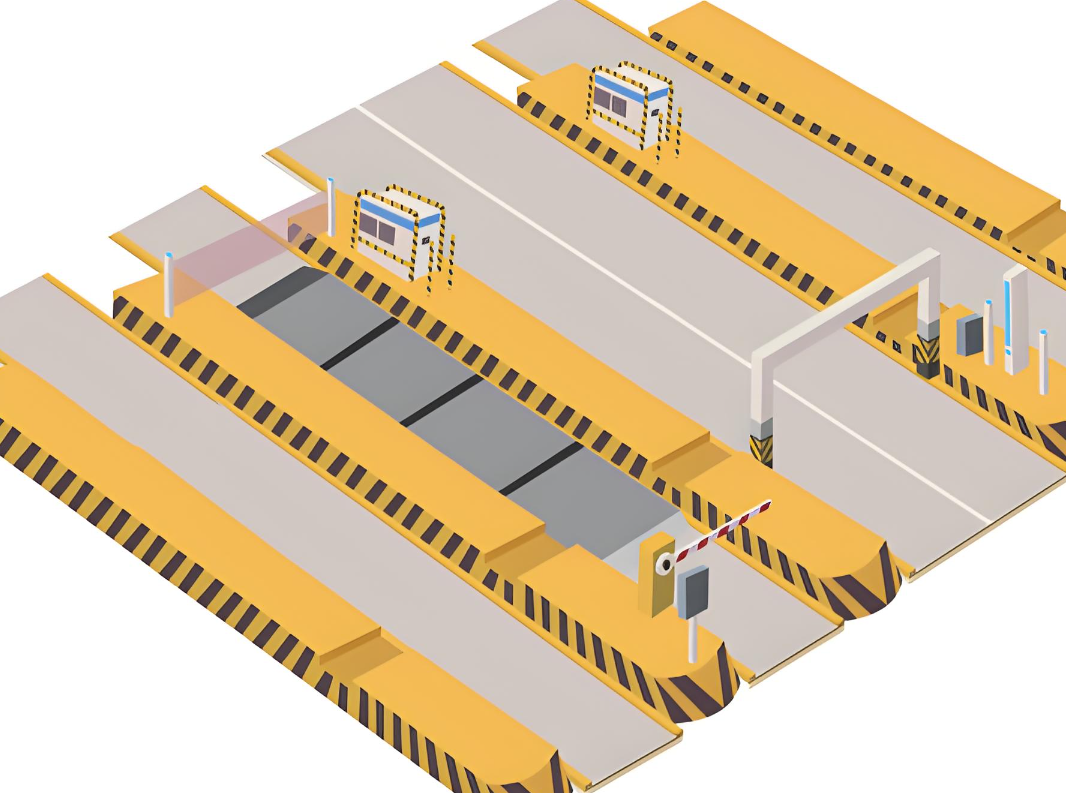
Narrow strip dynamic weighing system is mainly used for dynamic weighing of highway vehicles, commonly used in over limit systems, non current management systems, detecting over limit vehicles, implementing road safety management, and ensuring road safety and smoothness. According to the road width, each lane can be equipped with 2 to 3 lanes to meet the requirement of full coverage.
1. Introduction to Narrow Strain Gauge Weighing Sensor
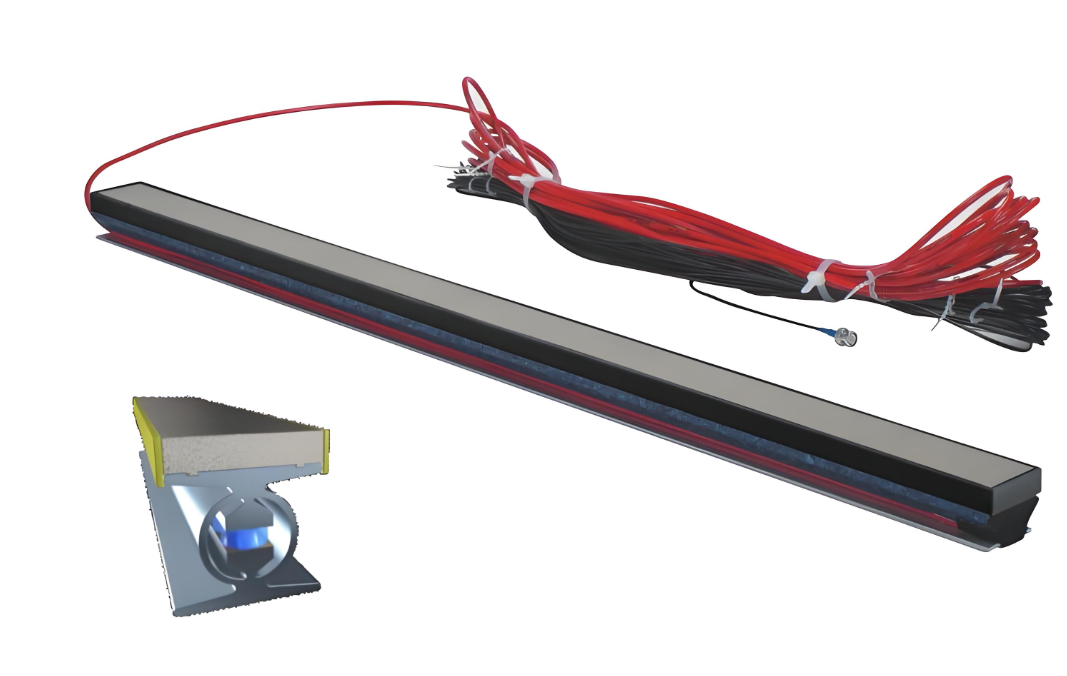
The Weigh-In-Motion Strip Sensors is the core component of the "narrow strip dynamic truck scale", installed on the road surface and combined with the dynamic weighing instrument to form a dynamic weighing system, which collects vehicle related information. Each lane is equipped with 2-3 narrow strain weighing sensors according to the road width. Its width is 120mm, thickness is 30mm, and the detection length is divided into 650mm, 1000mm, 1600mm, 1750mm, 1850mm, and 2000mm; Weight approximately 25-30kg (based on the length of the narrow strain weighing sensor); Output resistance of 40~53 ohms (depending on the length of the narrow strain weighing sensor); Sensitivity of 0.6mV~1.0mV/V (based on the length of the narrow strain weighing sensor); Comprehensive error ± 3% FS; Horizontal uniformity ± 5% FS; Excitation voltage 5-10V (DC/AC); Wheel load of 20t (maximum overload of 150% FS); Dual shielded 4-core cable output line; IP68 protection level; During installation, there is no need to set up a frame or drain water, and it is directly buried on the road surface; Epoxy concrete can be used as the installation material.
2. Installation of narrow strain weighing sensors - Road surface selection and power requirements
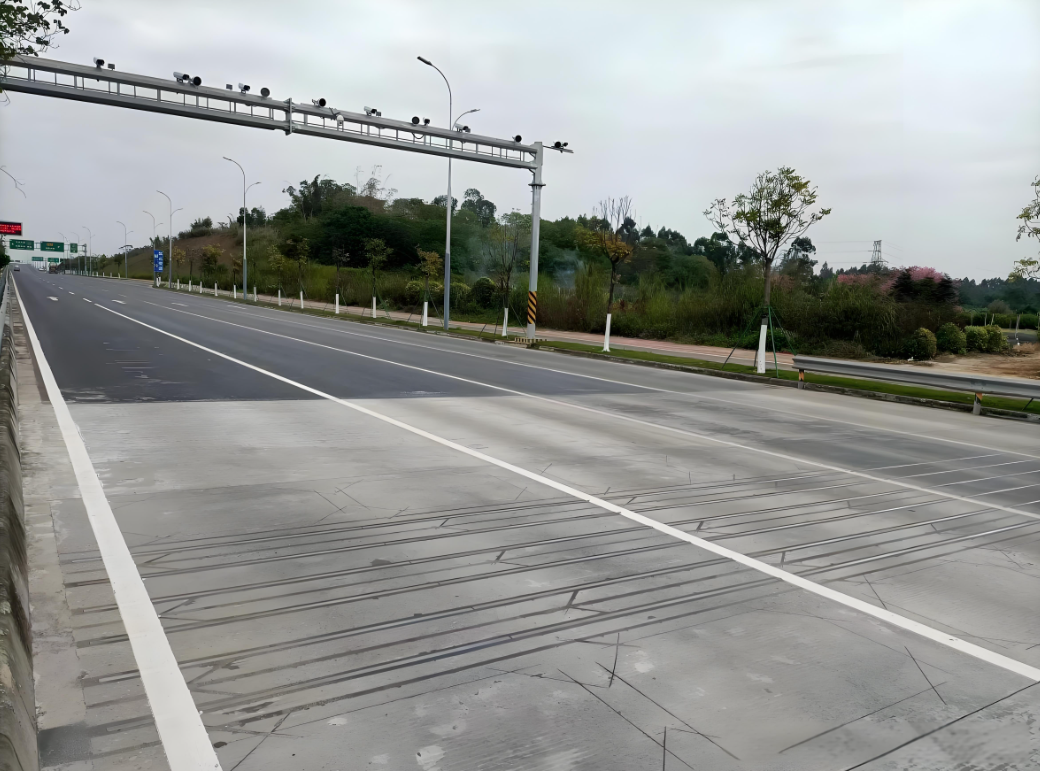
In areas with flat and straight roads, the distance from the intersection is greater than 500M; The radius of the road surface before and after the narrow strip strain weighing sensor in the system is not less than 1.7 kilometers; The longitudinal and transverse slopes of the road surface 100 meters in front and behind the narrow strain weighing sensor of the system shall not exceed 2%. Evaluation method for interval pavement conditions: A. Visual inspection; B. Vibration sensation during riding; C. 3-meter straightedge method (refer to ASTM-E1318). There must be no strong electromagnetic interference sources within a 5-kilometer radius around the testing point; Users should provide and maintain a foundation for establishing testing points based on the seller's suggestions; Users should provide and maintain the operating environment of the system instruments: temperature: 5-40 ℃, humidity:<95%, no condensation, dust-proof; The user should provide an AC: 50HZ ± 2% 220V ± 10% power system; When users do not need to meet the testing accuracy requirements specified in the standard, they can negotiate with the seller to allow the use of the device on road sections where the road conditions do not meet the requirements.
3. Installation manual and cycle of narrow strain weighing sensor
The Weigh-In-Motion Strip Sensors installation personnel form an installation team in a 1+2 mode, that is, a technician+2 workers mode. Installation time for each lane (2 sensors) is 4 hours, compressing lane traffic; The total duration of traffic interference in each lane shall not exceed 24-48 hours.
4. Road closure
Use warning signs, road barriers, conical buckets, and other isolation devices to set up lane isolation devices according to the traffic conditions of the construction section. When construction personnel are working on the road, they must wear reflective sign clothing, pay attention to traffic safety, and set up dedicated safety officers according to the road safety environment.
5. Positioning and layout
The general standard lane width is 3750mm ± 2mm. Under normal circumstances, two narrow strip sensors with a specification of 1750mm are used for layout. In special circumstances, a combination of one 1750mm and one 2000mm narrow strip strain weighing sensor is used for layout; The edge of the narrow strain weighing sensor is close to the edge of the roadside, with no gap left in the middle. The layout of narrow strip strain weighing sensors for other lanes shall be combined with various specifications of narrow strip strain weighing sensors according to their usage and driving habits.
6. Cutting
According to the requirements of the layout line diagram, adjust the depth of the cutting machine blade, use the cutting machine to first cut the outer edges of the narrow strain weighing sensor slot and cable gap, and then cut the part that needs to be removed in the middle of the narrow strain weighing sensor into small pieces that are easy to remove; The width and depth of the cut groove must meet the technical requirements.
7. Cleaning the tank
Use iron drills, hammers, or rock drills to remove cement blocks from narrow strain weighing sensor slots and wire slots, and clean them thoroughly; According to the requirement of slot depth for narrow strain weighing sensors, chisel the bottom of the slot flat; Use iron chisels to roughen the smooth groove wall at intervals of 30-50mm on the groove wall; Concentrate and uniformly dispose of cement fragments at the owner's location.
8. Cleaning
Use clean water to blow clean the narrow strain weighing sensor groove and cable groove, while using a wire brush to clean the mud at the bottom and around the groove, and wash away any debris such as sand and mud inside the groove. Use a powerful hair dryer to dry the water stains inside, outside, and around the narrow strip strain weighing sensor slot and wire slot, or use a spray gun to dry the water stains inside and around the narrow strip strain weighing sensor slot. When using a blowtorch to dry inside and outside the trough, be careful not to bake one area for a long time, in order to prevent the baking point from bursting due to high temperature.
9. Test the narrow strip strain weighing sensor
Place the Weigh-In-Motion Strip Sensors in parallel into the installation slot of the narrow strain weighing sensor (with the bolt facing downwards and the cable end facing towards the instrument), and check the flatness of the upper surface of the narrow strain weighing sensor and the road surface.
10. Connect the grounding wire of the narrow strain weighing sensor
Use 4 mm2 two-color multi-core ground wire (national standard) with the same length as the sensor cable. After one end is welded with a ø 6 mm lug matched with the output end of the narrow strain weighing sensor, fix it on the protective lug of the original narrow strain weighing sensor cable end, and the other end is aligned along the narrow strain weighing sensor cable.
11. Measurement
Measure the output resistance of the narrow strip strain weighing sensor using the resistance range of a multimeter (pay attention to the internal resistance of the multimeter itself), and make a record (including the corresponding number, wire length, and other information of the narrow strip strain weighing sensor); Measure the insulation resistance value (DC250V) of the narrow strain weighing sensor using a shaking table or insulation meter. During the measurement, connect the core wire (four cores in parallel) of the narrow strain weighing sensor cable to the shielded wire and the grounding wire of the narrow strain weighing sensor, and keep a record of the test.
12. Infusion
First, pour the prepared adhesive filling material into the installation groove of the narrow strip strain weighing sensor, place it flat into the narrow strip strain weighing sensor, evenly add appropriate weight to the narrow strip strain weighing sensor board, use iron chisels to nail the two ends of the narrow strip strain weighing sensor board, move the narrow strip strain weighing sensor back and forth with force, squeeze out the excess adhesive under the narrow strip strain weighing sensor board until the upper surface of the narrow strip strain weighing sensor is level with the road surface, so that it meets the flatness requirements of the narrow strip strain weighing sensor and the road surface before filling, and then remove the excess adhesive around it.
13. Polishing
After the filling material solidifies, use a grinder to remove the excess filling material that is higher than the surface of the narrow strain weighing sensor, so that the narrow strain weighing sensor is level with the road surface.
14. Inspection and measurement
Check the flatness of the narrow strip strain weighing sensor with the road surface after installation, and promptly address any issues that do not meet the requirements. Measure the output resistance of the narrow strip strain weighing sensor with a multimeter, measure the insulation of the narrow strip strain weighing sensor with a shaking table, and truthfully record the relevant inspection results. Archive and process the relevant information.
Flat weighing system
Weigh-In-Motion WIM Strip Sensors
Related Article